Friday, November 26, 2010

Mommy Crafts A....

Thanksgiving Kitchen Towels

When the kids were making their hand print turkeys earlier this week I had them stamp an extra turkey on each of these kitchen towels I picked up at the Dollar Store.

After they were dry I added fabric paint over top of their hand-y work ;) And added the words. What a great keepsake to pull out fall after fall!

Mommy Crafts...

Thanksgiving Tee Shirts


Looking for another activity to distract your young (not so patient) pilgrims? Whata cool idea I found....let them color their own shirt!!

The easy way? Coloring page + iron on transfer.
The way you do it without a printer? Hand tracing! Whew! But, they loved them.

I let the kids use regular markers, only because I kept forgetting to stop back by Ben Franklin and pick up the fabric crayons.

Now here's a tip: if you use regular markers and let them wear them for the day, you will find that they will spill everything they touch on them and the colors will smear! But on the up side, you can wash them and put them away for next year!

Wednesday, November 24, 2010

Thanksgiving Table Deorations From My Table


I don't usually do much as far as decorating the table for holidays and such (I've got two kids who know how to break things!)--but when I found this idea from Fiskars for a kids Thanksgiving table-- I HAD to do it for our family table!!

I absolutely love how it came out!

Now, they had a tree centerpiece with leaves, but I had found an idea on another site for a Mayflower centerpiece (made from wood--I used heavy paper and an empty tissue box) that I thought fit the theme better.

If you want to see all the how to's you can click here.

**Click the picture to make it bigger so you can see all the details. I LOVED how it came out!***

Paper Bag Turkey

Mommy Craft

These are the treat bags I made for the kids and added the turkey pops, the Indian corn and some printable thanksgiving activities.

To make this craft you will need:
  • Brown paper bags
  • Colored construction paper
  • Glue Stick
  • Stapler
  • Googly eyes (optional)

This craft really just uses your imagination. Cut out the turkey's beak, a waddle, and long strips for feathers. You could cut out the eyes, or use googly eyes (we got these huge eyes from a mix bag o' eyes at the Dollar store).

Fold down the top of your bag (like you were packing a lunch) AFTER you put your treats in, or stuff with newspaper for a decoration. Match each end of your strips of paper (feathers) to the top fold and staple.

Viola'!

**I forgot to snap a picture of the treat bags before I let the kids open them Thanksgiving morning--so this is the best I have of them :) **

Tuesday, November 23, 2010

Candy Indian Corn Treat

Mommy Craft


This was another cute treat idea I found. I used these and the turkey pops and made treat bags (you'll see that idea next) for my kids and another special little boy.

To make this treat you will need:
  • Reece's Pieces
  • Snack sized baggies
  • Tissue paper in yellow and green
  • Tape (clear)
I fell in love with how cute this was, and how wonderful it turned out! I found the idea here.

First, put Reece's Pieces in a snack sized storage baggie and zip shut. Get ALL of the air out. Cut lengths of your yellow and green tissue paper about an inch longer than your baggie, and half the width of your baggie. I used two cut peices of yellow and two pieces of green for each Indian corn treat.

Roll your baggie up as tight as you can. and make sure that the zipper part of the bag is not showing when you assemble the corn.

Stack your tissue paper up green, green, yellow, yellow. Put your baggie on top and middle of the pile. Gather all the layers at one end of your corn--tape the end together. Do the same at the other end.

Mommy Tip: If you wanted a different look you could roll the candy with just the yellow tissue paper and then add construction paper shucks to the corn as well.

I always say--use your imagination and make it your own way! :)

Turkey Pops


Are these not adorable?!!

To make this craft you will need:
  • Felt in a shade(s) of brown
  • Scissors
  • Rubber Bands
  • Googly eyes and whatever scraps you want to finish him off, I used:
  • Orange felt
  • Orange pipe cleaners (cut in half, one half per leg)
  • Red pipe cleaner (cut in thirds--1 per waddle)
  • Craft Glue
  • Tootsie Roll Pops
Cut 8" circles from your felt. Now, fold your circle in half, and in half again. Make a SMALL snip at the bottom, this will provide the hole for your sucker stick to go through.

Put your sucker through the hole, and gather the felt at the top back (like you were giving the lollipop a top pony tail). Secure with a rubber band, and fan out the remaining felt.

Decorate your turkey. The original idea that I found (which you can see here) used foam scraps--but I had extra felt, so I cut out a beak from my orange, added googly eyes, and curled a red pipe cleaner for the waddle.

To make his legs, I cut an orange pipe cleaner in half, then I twisted it around the bottom of the turkey pop making sure to keep it in the middle. I then "curled" each side to resemble legs.

Mommy tips: do not do like I did and "eyeball" the circle. The light brown ones are from where I tried to get to circles from one piece of felt. The fluffier dark brown one was closer to the 8" (nope, I didn't measure, just made sure I did it bigger. :)

Mommy Crafts A....

Pilgrim Outfit For Gracie


She was the "belle" of the Thanksgiving feast today. I made all of the accessories for Gracie's outfit and brought them to her when I came for lunch. The other kids loved to see her all dressed up and just made the biggest fuss over her!

Can you believe I made these pieces out of flour sack cloths from the dollar store, white grosgrain ribbon and hot glue?! I came up with the ideas and the patterns very late, late the night before her "event," but the very late hours were well worth it. Doesn't she look precious?!!

Monday, November 22, 2010

Hand And Footprint Turkey

Toddler, Pre-K, K

I won't insult any ones intelligence with the three hand, foot & thumbprint turkey crafts the kids and I made this week. Use your favorite colors and your imagination. And make sure the paint has dried before you add the extra details with a pen or marker. :)

Hand Print Turkey

Toddler, Pre-K, K

I won't insult any ones intelligence with the three hand, foot & thumbprint turkey crafts the kids and I made this week. Use your favorite colors and your imagination. And make sure the paint has dried before you add the extra details with a pen or marker. :)

Thumbprint Turkey

Toddler, Pre-K, K


I won't insult any ones intelligence with the three hand, foot & thumbprint turkey crafts the kids and I made this week. Use your favorite colors and your imagination. And make sure the paint has dried before you add the extra details with a pen or marker. :)

Pilgrim Hat Cookies

Mommy Craft

I made these cute little pilgrim hats for Gracie's first grade Thanksgiving feast--and they were a hit. It took me so much longer than I thought to make them--but if you aren't making 30--it is well worth the effort.

To make this snack craft you will need:
  • Chocolate chips
  • Graham Crackers
  • Marshmallows
  • Tooth picks
  • Paint brush (seriously!)
  • Wax Paper
  • Icing or candy melts
I painted the chocolate on my pieces--it really was a lot easier. You want to melt your chocolate--you can use the microwave or a double boiler.

Paint your graham cracker squares and place them on a plate/pan with wax paper.

Next, stick the marshmallow with a tooth pick. This will make this MUCH easier as well. Dip your marshmallow in the melted chocolate and use the paint brush to cover bare areas if you need (you will when the chocolate starts getting low.

Now, put the marshmallow on top of the graham cracker tooth pick UP. You are just using the tooth pick as an added handle. Once the chocolate on the marshmallow and cracker set, remove the tooth pick. You will likely need to paint the top of the marshmallow to make it an even color.

Using icing (or do like I did and melt some left over colored candy melts and put in an icing bag) and make your band and buckle.

Mommy tips: 1. do NOT attempt to melt the entire bag of chocolate chips at one time (lesson learned) 2. I made my "buckles" ahead of time and made square shapes on wax paper. I let it set and then they peeled off and stuck right to the band that I piped around the marshmallow.

Saturday, November 20, 2010

Friday, November 19, 2010

Football Bean Bag Toss


Save your Costco boxes, because your kids could also have as much fun as mine have this week!

This is the second hand made bean bag toss I have made so far, and they love them! I was hoping to make some football shaped bean bags, but my sewing machines are dead, so we just used the ones we have.

I decorated my box with a football field look and used a sharp knife to make a hole for the bean bag toss.

You never know what you can use with an old box!

Football Math

Mommy Craft for
K, 6 & Up

This idea I have had before, and I even made one for my then Kindergartner, but it was just before the move, and it was a little above her skill level. So, I made a new one now that she is much farther along in the math department.

To make this game you will need:
  • Green construction paper
  • Brown construction paper
  • Permanent marker
  • White crayon
  • Yellow construction paper (optional)
  • Contact paper (optional)
I simply made a field from my green construction paper. I ended up using a sheet and a half of green and I glued it to some left over poster board I had to make it stiff--but you could just made a one sheet field.

Use your white crayon to make the yard lines on the field, only instead of doing 10, 20, 30 etc do 1, 2, 3 ...to 10.

Add some yellow goal posts if you would like. I free handed mine and folded a small part of the goal post and glued it to the field so it would stick upright.

Now cut out football shapes from your brown construction paper. Use a dark black (thick is better) marker to make addition or subtraction problems on the football. I was unfortunately out of brown construction paper and thus I had to color my white paper brown and it looks super dark. I also wrote problems on both sides of the footballs, and I laminated them to hold up to use.

Have your child choose a football and they have to land the ball on the correct yard line. Gracie likes to toss hers, but the idea is to get the football on the correct answer. For example one football might say "1+1" and the child would put the ball on the "2" yard line.

Even being as girly as she is--Gracie loves this game and I am hoping it will help her to memorize some simpler math tables.

Thursday, November 18, 2010

Tissue Paper Pom-Poms

K, 6 & Up


We have to throw in something girly for this week--since I have a daughter, and she likes doing fun crafts with mommy even though she is a big first grader ;)

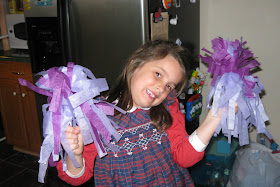
These pom poms are super cute--and super easy to make! Choose your favorite colors or favorite team and let's go!

To make this craft you will need:
  • Tissue Paper (your color choice!)
  • You need a "stick" to hold them, the original craft called for a dowel rod--I couldn't find one, but I did have large Popsicle sticks that worked great.
  • Scissors
  • Stapler
Unfold and smooth your tissue paper lengthwise.

Fold lengthwise, and cut it in half.

Now, fold your half in half (also lengthwise)

Cut strips starting from the bottom up to the fold-- leaving an inch at the top UNCUT. If you want to save some time, before you cut, fold your half in half again this time wideth wise, so you are cutting through 4 layers instead of two. Remember to leave an inch at the top where the fold is UNCUT.

Now wrap the fold edge around the "stick" of your choice and staple in place. The original idea called for tape--this did NOT hold for us, and it doesn't take much effort to add a staple.

You continue to do more and more layers until you get the fullness you are looking for. Since we used a staple I would add the next layer a few centimeters above the last layer so the staples wouldn't get messy.

My daughter was ready to play with them after only 3 layers, and we made ours 2 colors. If you want to do this, simply alternate the colored tissue paper layers (ex: red, then a white layer, then a red layer, etc.)

Go team go!

Wednesday, November 17, 2010

Paper Plate Football

K, 6 & Up


This is an idea I kind of thought out, and now not only is it a fun "decoration," but I tweaked it and decided it would be a great lacing project, or a great way to help your little boy learn to tie their shoes!

To make this craft you will need:
  • 2 paper plates
  • brown paint
  • scissors
  • hole punch
  • ribbon, yarn or string (I used brown, but white would work too)
  • Old newspaper
First let your child paint the BACKS of 2 paper plates (when put together they will look like a 3-D football). Let dry.

I cut my plates in half and then cut an 1.5 inch from one half of the newly cut plate (you will need to do this for the back and front, so cut an inch and half from 2 of your pieces). This will give the plate a more oval shape.

Next tape your half and your 1.5 inch shorter half together, set aside.

Punch holes along the straight edges of your two remaining halves. I put my halves together to be sure that the holes would match, but the paper was too thick and it hurt my hand! So, make holes in one of the halves, line the other plate up and make pencil marks on your un-punched plate, and hole punch it. :) Your holes don't have to be perfect though, it will still work fine, but you do want the same number of holes on each half.

Now, staple the halves to the whole plate you just taped together. Remember that you want it to look like a bowl shape in the middle, and you are going to fill it in.

Cut strips of newspaper (what I did), or be inventive with your filling and fill the inside of your ball until it has a good shape.

Now, lace your holes with ribbon or yarn or whatever you have. You can let your child lace it as a lacing craft, or you can lace the football like you would a shoe (as I did) and let your child practice tying his or her shoes.

Paper Plate Football Player

K, 6 & Up

This is such an easy idea--if you are looking for something fun to do with your little boy--this is it!

To make this craft you will need:
  • 2 paper plates
  • Crayons, markers or paint
  • Scissors
  • Stapler (or tape)
First color or paint the inside of your paper plate skin color, or forget that part and add your face (eyes, nose, mouth, etc).

Now, turn the other paper plate over and draw a half circle INSIDE the circle that is already in the middle of a paper plate.

I cut in two small rectangles underneath the half circle to give it more of a face mask look. If you child is more into football they may have better ideas to make him more realistic.

Now, staple or tape your face mask/helmet to your football player.

I like the way this player came out, but you could paint or color the top part of the face mask/helmet to match your child's favorite team, or let him or her create their own team and design.

Tuesday, November 16, 2010

Football Handprint

Toddler, Pre-K, K


I love making hand prints with Thomas, and when I decided to do a "football week," I racked my brain trying to figure out the best way to use his hands. While searching for fun football ideas (which there are very few! Most of the ideas you will see this week I made up myself!), I came across a clip art graphic and the light bulb went off.

Now I love the outcome--but the football in the middle would look just as cute (maybe better--who knows) as just a drawn or cut out ball. When you do this craft you can try either way.

To make this craft you will need:
  • Paper
  • Skin color paint
  • Brown paint
  • A cute pair of hands
I simply had him make hand prints with both hands and left some space in the middle and top for the ball.

I closed his fingers and didn't paint his thumb when I made the football. But, as I said, I think it would look just as good or better if you just drew or painted or cut out a football shape.

I added the "touchdown" part just to be cute.

Monday, November 15, 2010

Football Treats

Mommy Craft

I saw this idea on the back of a Cocoa Krispies box once and filed it away for later. Glad I did, because these were cute and yummy!

To make this snack you will need:
  • Cocoa Rice Krispies
  • Butter
  • Marshmallows
  • Chocolate Chips (melted) or brown or white icing
  • Wax Paper
Follow the directions to make your rice krispie treats, only use cocoa krispies.

Let your mixture cool--A LOT!

Use wax paper to get a handful of the mixture and shape into a football. Put on your plate or serving dish. Repeat until all of the krispies are used.

Now, melt your chocolate chips and put in a icing bag, or fold a piece of wax paper like I did, and make laces on your footballs. You could also use brown or white icing to do this as well.

Enjoy!

**A few "notes:" mine have a different color to them because I added in some regular rice krispies thinking I wouldn't have enough for the butter & marshmallow mixture I "eye balled." Also, the Rice Krispie website has the recipe for the footballs, but they add in peanut butter, and I thought "nah." So, I used the original recipe to make the krispie mixture, which I have added below. Click on this link if you want to give the peanut butter one a try **


Here are their "pretty" footballs, but I have to say mine came out cute too**

Rice Krispie Recipe
  • 3 tablespoons butter or margarine
  • 1 package (10 oz., about 40) regular marshmallows
  • - OR 4 cups miniature marshmallows
  • 6 cups Rice Krispies®

1. In large saucepan melt butter over low heat. Add marshmallows and stir until completely melted. Remove from heat.

2. Add KELLOGG'S RICE KRISPIES cereal. Stir until well coated.

MICROWAVE DIRECTIONS:
In microwave-safe bowl heat butter and marshmallows on HIGH for 3 minutes, stirring after 2 minutes. Stir until smooth. Follow steps 2 and 3 above. Microwave cooking times may vary.


Note

For best results, use fresh marshmallows.
1 jar (7 oz.) marshmallow crème can be substituted for marshmallows.
Diet, reduced calorie or tub margarine is not recommended.
Store no more than two days at room temperature in airtight container. To freeze, place in layers separated by wax paper in airtight container. Freeze for up to 6 weeks. Let stand at room temperature for 15 minutes before serving.

Saturday, November 13, 2010

Friday, November 12, 2010

Stain Glass Leaves

K, 6 & Up

This activity is definitely for older children, I would recommend Kindergarten and up.

To make this craft you will need:
  • Contact paper (clear)
  • Tissue paper in fall colors
  • Leaf pattern print out (or hand drawn)
Cut out a square of clear contact paper and lay it over top of a leaf pattern print out--sticky side UP (you are using the pattern under the clear contact paper as a guide for your kids). Have your child tear off small pieces of tissue paper and stick it (as flat as they can get it) to the sticky contact paper, staying inside the pattern (the best they can).

Once they have finished their colors you will need to place another square of contact paper over top of the finished tissue paper. Carefully stick and smooth the contact paper on top of the other piece.

Then, using the same pattern they used, trace with a pencil the shape on to the contact paper.

Your or your child can cut out the shape.

You can add a hole punch and hang with string, or do like I did and just tape them to the window. These look so pretty in the afternoon sun!

Mommy note:
Another variation I have seen on this craft is to cut out the leaf shape with black construction paper and cut the middle out so it looks like a frame (you would need two of these). Stick the pattern you just made to the contact paper and the kids fill in the middle with tissue paper like above. This makes it easier for the kids to stay inside the pattern I am sure. Then, you lay the other leaf pattern on top of the bottom one hiding any scraps that weren't "inside the lines" and top with another square of contact paper. The kids and I may try this version in the weeks to come, and I will be sure to post the outcome and let you know if it was indeed easier!

Below are some leaf patterns to get you started:

Thursday, November 11, 2010

Five Little Squirrels Activity

For your ToddlerI had two different ideas about how to use this adorable little rhyme:

Five Little Squirrels

Five little squirrels sitting in a tree. (Hold up five fingers.)
The first one said, “It's getting cold for me.” (Hold up one finger.)
The second one said, “The leaves are falling to the ground.” (Hold up two fingers.)
The third one said, “Let's get busy; there are nuts to be found.” (Hold up three fingers.)
The fourth one said, “We better not wait.” (Hold up four fingers.)
The fifth one said, “Fall is really great!” (Hold up five fingers.)


I thought I could color and cut the squirrels and put them on Popscicle sticks to do the rhyme with my toddler, and then I got the great idea to use flaps since those are his new favorite kind of books.

I will tell you how I did my craft, but you could use the rhyme in anyway you like. This craft is a little more time consuming, but Thomas is enjoying it, and to me that is all that matters.

To make this craft you will need:
  • Green construction paper
  • Brown construction paper
  • Scissors
  • Glue Stick
  • Tape
  • Squirrel pattern
There are tons of squirrel patterns on the web for you to use, and I will share one below. The one I used was extremely small and I actually traced all five squirrels by hand after blowing it up in Microsoft Word (which made it even more grainy, thus my tracing).

I simply colored my squirrels with coloring pencils (you could color with whatever, or find a colored squirrel pattern and print it out saving you a ton of time, or you can let your child color the squirrels!.

I used two peices of green construction paper and taped them together and then cut out a tree shape free-hand. I free handed a trunk with one sheet of brown as well.

Before I added my trunk to the bottom, I cut each squirrel out placed him face down to the BACK of my tree top, taping it around the edges. I used a sheet of carbon paper from Gracie's pretend waitress pad and placed the carbon paper under the tree top, and drew a door opening around the edge of the squirrel from the back. (Basically you need to make sure you have a door/window to open to see the squirrel. I made my flaps open in several different directions so they didn't all go the same way, and I cut them out.

If you don't have carbon paper, cut your doors (flaps) out of your tree top FIRST and then tape your squirrel to the underside (which in hindsight was probably a much easier way to do it!!).

Add your trunk to your tree top.

I used the left over brown paper to make my little handles for the flaps. I cut thin strips and rolled them into a tight curl. I taped them closed and then used good glue to add them to the flap door.

I made a copy of the rhyme to add to the bottom so that we can open the doors one by one as we read about each squirrel.

Now whether you have the time and energy to do this craft or not, you will want to share the rhyme with your preschooler. You could use stickers, or make felt squirrels and add to a winter glove. There are tons of ideas out there--use your imagination!

Squirrel pattern:

Wednesday, November 10, 2010

Squirrel Magnet


6 & Up, Mommy Craft


There really isn't much of a pattern for this craft, but I found the idea on a Bible School web page. So, I kind of did my own thing, and it looks super cute on the fridge. But, you too can make a squirrel magnet for fall, or really any kind of magnet to show off your little ones art work.

To make this craft you will need:
  • Paper
  • A good pattern
  • Brown Paper bag
  • magnet
I started to make my magnet out of felt, but I found that it was a lot harder to do, so I just used thick brown construction paper, traced the pattern on to it. I added some contrast by making certain parts of the squirrel and nut a different color. I used a brown paper bag for the squirrel's belly (which I just kind of free-handed), and the top of the nut. The bottom of the nut is brown paper bag too, but I knew it needed some color, so I colored over it with a maroon-ish colored marker.

Once I finished my cute little squirrel I used an old magnet. You probably have a ton of these some where like from a pizza or Chinese place. But, if you don't, you can buy magnets from the Dollar Store or any other place, usually in the craft section. Just glue your art work to the front of it. I cut my magnet a little and used a small strip for the nut so that it would lay nice and flat.

I had already decided to make a squirrel magnet for the theme this week, but when I found the adorable saying days later, I couldn't wait to get it assembled. What a perfect reminder of what we are all striving to do as parents!

"From little acorns mighty oaks do grow"--American Proverb

If you want to use the same squirrel I used, I am adding it below. It was simply a free coloring page I found online.

Tuesday, November 9, 2010

Leaf Rubbings

Toddler, Pre-K, K, 6 & Up


By far one of most simple of fall crafts.

Let your kids loose and tell them to find all different kinds of leaves in your back yard, or front yard, or the playground, or the park, or even the church lawn. Have them avoid brown crunchy leaves, and of course and leaf the unidentifiable content ;)

For this craft you will need:
  • White paper
  • Leaves assorted shapes and sizes
  • Crayons (fall colors will better show the season and idea, but any crayon will work)
I would suggest doing this craft outside if you have the space. If not, spread news paper or use paper towels or something to hold the leaves. I did this craft with Gracie when she was small and we lived on the top floor of and apartment. Needless to say the leaves brought in all sorts of "visitors" and you will want to scoop up the leaves quickly when you are done and toss them.

Simply have your child place a leaf UNDER the white paper and rub gently with a crayon over top. Soon they will see the veins and stem and outline appear like magic. It is so neat to watch their faces when the leaf slowly appears to them.


Monday, November 8, 2010

Nutty Squirrel Game

Mommy Craft
Game great for: Pre-K, K, 6 & Up

*I let my toddler play this game with me and his big sister, but since it calls for a small but, you want to be aware of the choking hazard. I keep the nut put up and will pull it out for games. But, you may just want to make this cute little squirrel with or for them**

Where is the nut?! That is the question my daughter keeps giggling to her little brother. What a fun fall craft and game wrapped in one! These squirrels make a great addition to my fall decor and they double as a fun afternoon game for the kids and I.

It is definitely a win/win.

To make this craft/game you will need:
  • Egg carton (empty ;)
  • Brown paint
  • Brown pipe cleaner (just 1)
  • Brown felt
  • Black mini pom-pom (I just used a piece of scrap black felt, my pom poms were too big)
  • Googly Eyes
  • An acorn/nut
(I am copying the instruction from the Family Fun site where I got the adorable idea. They do a pretty good job of explaining it, and I wouldn't want to miss anything as I recall how I did it.)

Instructions
  1. Nutty Squirrels - Step 1 To make the squirrels: Use a pencil to poke a tail hole in one side of each cup, then paint the cups. For each squirrel, cut a face, ears, and a tail from brown felt. Once the paint dries, glue the faces onto the cups, then glue the eyes, ears, and pom-pom noses onto the faces, trying to make the squirrels look identical for a better game. Fringe the edges of the felt tails and glue a piece of pipe cleaner in the center of each, letting a 1/2-inch stem extend beyond the bottom. Attach each tail by inserting the stem through the hole and gluing it to the inside of the cup.

  2. To play the game: With the other players watching, place a nut on the table and cover it with one of the squirrels. Now begin sliding the squirrels around the tabletop, weaving them around each other to make the other players lose track of which squirrel has the nut. The faster you move them, the more likely you are to distract your audience. After a while, stop and challenge one person to guess which squirrel hides the nut.

Mommy Tips: First, when they say "be careful making your hole"--be careful--ouch! As I mentioned in the supply list, I just used a piece of black felt for the nose, but you could use black construction paper. Now, here's another thing with the game, maybe my egg carton was too big, but Gracie could clearly see the nut under the side of the squirrel whom posses it. So, I plan to go back over and add some felt around the carton openings to make it a little harder. And, don't forget your nut can be a challenge with small kids who like to put things in their mouths. I couldn't find an acorn, and I have no idea what nut that is that I did find, but it works. You could substitute the nut for a pom-pom or something else clever, but it would still need to be small, and thus a possible wind pipe blocker--so keep it up around small ones.

Fall Treat Tree

Mommy Craft

This edible fall idea has been around for a while, and like the finger print tree, it has many versions, so get creative..and messy.

Now if you asked me which one I chose, I would say my own super duper HARD way!

I am not an engineer, but I couldn't figure out how peanut butter was going to hold these pretzel sticks upright, so I got the bright idea to use a marshmallow cut in half for a base.

It kind of worked...

For this snack craft you will need:
  • Pretzel rods
  • Graham cracker squares
  • Regular shaped pretzels
  • M&M's in fall colors, or sprinkles
  • Peanut Butter
  • Marshmallows (optional)
The idea is to put the pretzel rod and stick it to the graham cracker base, Then you break the pretzels regular shaped snacks to look like branches and stick your candy leaves to them, also with peanut butter.

I only had miniature pretzel rods and regular shapes, so I took 3 rods and stuck them in half of a marshmallow that was stuck to the graham cracker. I used the other half of my marshmallow to put a the other end of the pretzel rods. I broke the regular shaped pretzels and made branches and stuck them in to the top marshmallow as well. I cut my M&M's in half (to cut down on the weight and because it looked more leaf like) and then put peanut butter on those and stuck them in the branches.

All of this took time and patience, and my saving grace was the freezer. It helped freeze it all together.

Just before snack time I pulled them out and covered the bottom marshmallow with more peanut butter and shook on some crushed pretzels and M&M's to look like fallen leaves.

I wouldn't call it a piece of art--but it was kind of cute, and Gracie thought it was yummy. (Nope, Thomas wouldn't touch his).

Hand & Fingerprint Tree

Toddler, Pre-K, K, 6 & Up

There are many variations on this craft, so use your imagination and have fun with your kids. In years past I have made a mommy tree and a Gracie tree on very large newsprint. And, until this year I didn't even think to use my child's hand and arm for the trunk and the branches. You could do one tree, or a whole forest--but when you and your little one make the leaves, don't forget a few that have fallen to the ground.

For this craft you will need:
  • Brown paint
  • Red, Orange, Yellow (or your leaf color choices) paint
  • 1 cute hand (and possibly arm)
  • 1-5 adorable finger tips
If you want to save your child's hand print along with the finger print leaves, cover their hands in brown paint. You could paint a bit of their arms with brown as I did, but my toddler didn't get the idea and it smeared. He was used to hand prints, but not the arm. It is just as cute to then paint your own stem.

Clean off the brown from your child's hand. There really is no reason to make them wait until it is dry. They are already having fun in the paint and odds are you aren't going to want to pull this all out again. So, start painting their fingers.

With my young one I tried to just paint his pointer finger. I got better results with one finger. When the process got tedious and he got bored, I painted each finger a different color and kind of "stamped" his fingertips--but you can probably see how those smeared. Pre-K and Kindergarteners should be able to not only make their fingerprints clear, but will also be able to change from color to color.

Experiment with the colors and don't forget to put some at the bottom of the tree. I have my kids do one color at a time because they will eventually get yellow in the orange ad red, etc--but I didn't have this luxuary with Thomas, and I kind of like the blended colors! They are a lot more realistic.

Have fun!!

Saturday, November 6, 2010

Mommy Crafts A....

Game For Thomas


So this game took me longer than the few minutes it took to assemble Gracie's game, but mostly because my sewing machines are still dead.

When I saw this craft idea I just HAD to make one!! And even hand sewing this adorable color matching game didn't take too long, and if you have a machine that is up and working, it wouldn't take you more than a few hours.

Thomas has already been enjoying his game. He doesn't know his colors yet, but it seems to be "sticking" now that we are playing. He of course just enjoys mommy's squeals when he (randomly) gets one right!


Mommy Crafts A....

Game for Gracie


I found this amazing idea at my new favorite blog "Dollar Store Crafts." I made this whole game (which she loves!) for $2! You can see the original idea here, but it is pretty simple.

The tile piece I picked up at Home Depot for $.94 and the river rocks came from the Dollar Store. I had paint markers on hand and I used a straight edge to make the grid and to paint the x's and o's on the rocks.

This was a HUGE hit, and would make a fun rainy day activity, or even a gift!

Friday, November 5, 2010

Wise Old Owl Nursery Rhyme

On the back of my owl puppet I put the famous nursery rhyme--that is quite frankly; good advice for kids and adults alike!


If you want to print out and color a version of this rhyme, click here.

Wise Old Owl Puppet

(Make for--Toddler), Pre-K, K


I can't believe I didn't have any brown paper bags! But, I had white ones and brown crayons, so I improvised.

I got this puppet craft from one of my favorite kid craft sites: DLTK Kids.

You can find the pattern for each of the owl's parts on this page. But, I just free handed them, they are pretty basic.

For this craft you will need:
  • Brown paper bag (lunch size)
  • Brown, white, yellow, orange & black construction paper
  • Glue Stick
Simply add the features with your glue stick and let it dry for a few minutes. My toddler has loved watching me make the bird talk, and then he wanted a turn.

Now, you may wonder why mine doesn't look like DLTK's version. Well, I thought it looked silly just colored brown, so I cut out small "feathers" from my left over scrap paper and gave him a more 3-D look.

Paper Plate Owl

Toddler, Pre-K, K


This was fun and simple, and it doesn't take much time (once your paint dries), so if your child has a small attention span like mine--this is a great one!

For this craft you will need:
  • Two paper plates
  • Brown paint (washable is best)
  • Orange, yellow, and white construction paper (scrap pieces is fine)
  • Scissors
  • Stapler
  • Glue Stick
Paint your two paper plates brown all over, and let them dry (takes a few hours).

Now, cut one of your plates in half. Cut around the other paper plate and cut ear shapes at the top sides (just slightly rounded triangles).

Cut round circles from your yellow paper. Cut slightly smaller circles with your white paper, and even smaller circles with your black paper. I free handed all of these things, but the blog where I got the idea has patterns for you to use if you want.

Now glue the white on to the yellow, the black in the middle of the white, and then the whole eye to the whole paper plate. Add a triangle nose just under the eyes.

Your two paper plate halves are the wings. "Curvy" side up, cut side goes down. I stapled mine to keep the wings more secure and to speed up the process.

I also added a hole at the top and put some ribbon through it to hang and enjoy our creation.

Thursday, November 4, 2010

Mommy Crafts A....

Owl hat (beanie), matching scarf & stuffie!

I found this cute idea that another mom created out of an old sweater. I didn't have an old sweater, but just HAD to made this craft (even with both sewing machines busted!). I got a brown knit shirt from the thrift store ($1.50) and had a great time hand sewing these treats for my toddler.

The original crafter only made a scarf and hat, but I hated to waste the rest of the shirt, so I found an owl pattern on line and made him a matching stuffie!

Here's the owl pattern I used for the stuffie:

Count Your Blessings

Mommy Craft

I am going to take a break from the owl theme and share with you a great idea I found online.

Make a blessings countdown to Thanksgiving!!

What a great way to countdown to the holiday and remember what it is all about at the same time.

The original crafter had her children read the card each night at the dinner table (which I love!), but I am having my children help fill up the cards.

When making the poster I realized that there were 25 days in November until Thanksgiving, and there are 26 letters in the alphabet. So, I am tweaking the idea and making a letter a day. Gracie is having fun coming up with things she is thankful for that start with that letter.

Since we started a few days late we had to catch up--but not by much and I still very much wanted to do this craft idea.

For this craft you will need:
(well, you should do it your way, but I will tell you how I made mine)
  • 13 regular sized envelopes
  • Scrapbook paper
  • Glue stick
  • Index cards (25)
  • Sharpie or pen
  • Large poster or foam board
I sealed all 13 envelopes and then covered them with scrapbook paper. I didn't have any of these on hand like the original crafter, but it wasn't that much to pick up 5 different sheets at Ben Franklin. Plus, I was able to color coordinate them :)

I cut the envelopes in half and lined them up on my poster board in nice rows and glued in place.

I cut index cards down to just slightly stick out of the top of the mini envelope holders.

I added a title, and some added shapes to a few of the pockets for flair.

Now you just have to add your blessings one by one to the "calendar." You could add them day by day, or do as the original crafty mom did and write them and have the children read them at dinner time.

Have fun counting your blessings, I am sure you have many!

Wednesday, November 3, 2010

Owl S'Mores

Mommy Craft

I made these last week for Gracie's fall snack (not-a-party) at school, but decided to wait and post them with the owl theme. I found the adorable idea online (hers are way prettier than mine), and just had to try them out.

Now, I usually put my mommy tips at the bottom of posts, but let me warn you: *these are not as easy as they look to make.*

Now, maybe I went in to it too cocky, or maybe I just stressed since I had to make them for her class, but looks are deceiving! Now, don't get me wrong you CAN do this--just give yourself time, and some extra materials to work with, you are going to have to do a little trial and error. Read below the post for more tips from a mommy who has made these.

To make this snack idea you will need:
  • Graham crackers
  • Chocolate Chips
  • Yellow Candy melts (look in cake decorating isle)
  • Candy Corn
  • Marshmallows
Cut your marshmallow in half. Put the halves on the cracker side by side and squish them together slightly.

Place a yellow candy melt on top of each marshmallow half.

Microwave for 5-7 seconds *watching it the whole time!* You want the marshmallows to puff up a bit. Turn the microwave off (or open door) when you see the marshmallow puff. When they go down IMMEDIATELY put your chocolate chips in the center of the yellow candy melt, and squeeze a candy corn piece between the eyes.

Sounds easy, right? ;) Seriously, you can do it and they are a huge hit...here are some more tips.

Mommy Tips:
  1. Have your chocolate chips and candy corn right beside your microwave, you need to be able to get to them quickly.
  2. Learn my lesson the easy way--you are going to have to do microwave them one or two at a time. I started with 6, then 3, and ended up doing 1 at a time after wasting lots of ingredients and time.
  3. I found more luck (and less marshmallow explosion by a) cutting my marshmallow in thirds, discarding the middle and using the two outside pieces for my eyes. b)pushing the marshmallow pieces together as much as I could without losing shape and c) putting the marshmallow "eyes" on the cracker about an inch down from the top, keeping it as far from edges as possible while still maintaining the "owl look."
  4. Your chocolate chips are probably not going to stick. At least not right away. It will take time for the heat to rise to the chips, so move them carefully to your flat space for them to cool. You may have to go back and use a hot knife (like I did) and gently melt the bottom of the chocolate chips and carefully place them back on the eyes.
  5. Make sure you use wax paper on your microwaveable dish, or you will be doing tons of dishes, and to use it on a flat surface to store the cookies until you are ready.

Monday, November 1, 2010

Owl Hand And Footprint

Toddler, Pre-K, K

I found this idea on DLTK's website, but it called for paper, and I am a big fan of doing hand and feet print in paint...so I adapted it.

I didn't find anyone else who used the footprint for the body--but I think it looks darling! The toes look like tail feathers, don't you think?

For this craft you will need:
  • Brown paint (washable is best)
  • Paper
  • Markers (thin if possible) in black and orange
  • An adorable foot, and two cute hands

Have your child paint and press their foot down first. I used the toes to make tail feathers, so be sure to turn your paper if necessary before you do the hands.

Have the child do both hands so you have more realistic looking feathers. Put the palm of your child's hand as close, and even overlapping some, to the heel of the footprint as possible.

Wait for the pain to dry and add your beak, eyes & claws with your markers.

Mommy Tip: as I always say add your child's name and the date! Plus, when you paint the hands and feet you will have enough for a another "pressing," so have another sheet of paper ready and make two. One to keep, and one to give away.